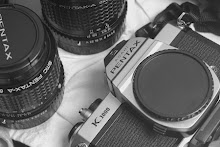
During all these years of failure, I spent a great deal of time working with nothing. Knowing what I know now, if you have only a simple camera and a lens, and very little money to spend, here’s what I would consider advising for growing your equipment collection on the cheap:
Plan those big advances in equipment. The tools are going to cost you. Pick carefully. There’s enough of a selection out there on the market today to let you take anything from an action shot of a paramecium through a microscope to the moons of Jupiter and the rings of Saturn while perched on a mountaintop on another continent.
Plan those big advances in equipment. The tools are going to cost you. Pick carefully. There’s enough of a selection out there on the market today to let you take anything from an action shot of a paramecium through a microscope to the moons of Jupiter and the rings of Saturn while perched on a mountaintop on another continent.
Search for hidden costs in those big equipment purchases. One of the reasons I do not own a view camera, although I would very much like to own and use one, is that I cannot afford the space and supporting materials to own and operate an enlarger of that size.
My rig is set up for medium format. I keep a simple set of tight equipment that works well in my collection. I can store it easily. I can set it up and operate it at will for a reasonable cost. I cannot afford a 4X5 enlarger the size of a refrigerator in my transient bachelor lifestyle.
Think ahead, if you had this equipment that you desire to use, what would it take to get it up and running and use it to death on a daily basis?
If you are not willing to use it to death on a daily basis, you may not need it.
If you look at your photos, and you see that yours are not cutting it because the photographers you admire have those strong blacks and strong whites and delicate grays in just the right places in their photos, and yours do not, maybe it is because your exposure is habitually wrong. It could be the printing process you are using; it could be your exposure decisions during the camera operation; it could be the way you are developing the negatives.
Get a good book written by the masters about calculating exposure. If you cannot afford to buy one, go to the public library. Even if you can afford to buy one, go to the public library anyway. There will be a treasure trove of books on photography there. You can peruse them at your leisure without having to spend anything. A typical shelf of photography books in a library usually represents a cost of hundreds of dollars invested by the community. The intensity and organization of the content in library books are usually superior to the cosmetic overviews and commercial ads found on the internet.
Before you go out to get that next lens or camera body, consider growing your equipment collection along the path of the process of photography, if you have not done so already. Can you develop your own negatives with what you have? Can you make a print? If not, put a stop to that. The other stages of processing, beyond the camera, each, have almost as much influence and control over the appearance of the print as the camera operation does.
If you only have a camera and a lens, consider this outline of how to expand your equipment collection:
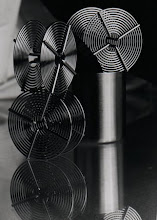
For developing the negatives, at a minimum you would need: a developing tank that fits one or two reels; a graduated cylinder (I prefer two) for measuring liquid to the right proportions; a changing bag for conveniently loading the film into the reels, some way to light proof a room (I find that dark blankets do well); some chemicals for three-bath development (developer and fixer are required, you can add a stop bath or use plain water); some way to hang your negatives to air dry.
I also like to use a thermometer and some opaque bottles to store the chemicals in. I use one set of buckets for mixing bulk chemicals. I use small bottles that hold one liter for storing smaller, easy to use amounts; the small bottles make it easy to pour the right amount into the developing tank. For pouring back out, I catch the outgoing liquids in one of two graduated cylinders. The other cylinder is already loaded with the chemicals for the next stage going into the developing tank.
For printing, the minimum amount of equipment would go into supporting a contact printing process. This may not be attractive to the beginner, but I have found that in my own darkroom, it is the contact print that is the most informative to me. A bare minimum equipment list would be: a common picture frame (for holding print paper and the negative together in a flat, organized way); some method of turning on a light on and off quickly and decisively (a wristwatch and a light switch might work, it depends on the speed of the paper); four containers (trays) for holding the developing chemicals; a source of water; some way to hang up the prints to air dry.
For convenience, I would recommend a paper safe or some other method for storing the print paper in a light-tight box. The print paper will come packaged in an opaque plastic bag inside the manufacturer’s box, but a separate light tight storage is a good idea; that way, if you do have an accident and expose the bulk paper to light, you may have had the chance to compartmentalize your collection of print paper. With some paper in the box, and a small amount of paper in the paper safe, you would only risk a portion of your supplies to your own bumbling.
Let me caution you: the minimum, for the printing stage, will be frustrating to use. For darkroom work, you will really need an enlarger, a safelight and a timer. Add that, and you will really get rolling! But, as you can see, even if you have “nothing to work with,” it’s not the expensive items, but, rather, frequently used common or inexpensive items that can get the process rolling all the way through for you.
Research the process before you start building your improvised darkroom. The process and equipment I have outlined above, for printing, is thin; but, it will work to make very small prints you can learn from.
As you acquire equipment, save the technical data sheets and manuals that come with them. Yes, after a few moments of review, you will probably figure out how to use that camera. Yet, sooner or later, you can benefit from a review. Somewhere in those data sheets, somewhere within that operator’s manual is that one sentence, that one word, that you will need to improve your procedures. They can help you uncover mistakes and improve your photographs long after you learn the basic functions of your camera and its supporting equipment.
For some unknown reason, people have a tendency to throw away the data sheet that comes with photographic print paper. Maybe it is because when they open the box, they are in the dark. We are usually focused on protecting the print paper from light at that point; maybe sometimes thinking about an upcoming print instead. Save that print paper data sheet, too. It can help you later.
# # #


No comments:
Post a Comment