
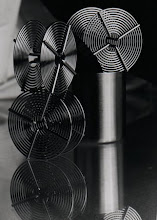
Church Roofline at Beginning Evening Nautical Twilight.
Counteracting Rayleigh Scattering with White Balance
and Attaining a Coloring Influence (Light Blue) From
Deliberate Discrepancy.
Original photo showed the sky as gray,
when it appeared to be blue, with a sunset behind the camera position.
Light temperature, approximately 4200K.
Recorded as D50, 5000K.
Processed as Tungsten, 3200K.
Pentax K200D, 1/90, ISO 400.
Lens and aperture unrecorded.
Sometimes the concept of white balance is confusing for people who have just begun to gain experience editing in color. To make matters worse, sometimes our advice or directions sound convoluted or confusing.
The directions will sometimes be what sounds like a one step summary. "Set for 5000K," they'll say, or something like that. Meanwhile, that's a one-step answer to a three step problem.
White balance is a three layer problem. It's not one answer. In the final image, it's the result of at least three phases of editing, not including any deliberate additional tinting or filtration of light.
By the time we get to the final image, we have had at least three chances to edit what is regarded as white light.
White balance is a three layer puzzle.
For reflected photos (prints):
1. The color of the light striking the subject.
2. The definition of white by the recording media.
3. The definition of white in later processing.
This is why sometimes coaching our way to better white balance, or deliberately edited white balance, is sometimes confusing. Each subsequent stage can emphasize or neutralize the effect of the stage before it.
Further, discrepancies in emphasizing or neutralizing generate a new, observed color of white. If the effect of coloring or defining white cannot be adequately counteracted in later phases of processing with standard white balance temperatures, it is often because the preceding layer's temperature was not accurately observed by the editor. Hunt down the discrepancy by accepting that the light was recorded as the media observed it, which may not have been at a common temperature.
If the photo was made during daylight, then the apparent color temperature of the sunlight will serve as the basis for subsequent edits of an available light photo. This is because the influence of the sun will almost always overwhelm the influence of other light sources during daytime.
Sunrise, Sunset, Rayleigh Scattering and White Balance
The apparent temperature of daylight shifts during twilight. Daylight 5600K is the balance for many color films. At sunset, the apparent temperature is often very close to the white balance value for tungsten, 3200K.
At the onset of nautical twilight, the shift towards tungsten white balance values will accelerate. This is another description of the golden hour's yellowishness.
Why? Why does this appear to be so? The amount of heat the sun emits does not change. Yet, the light becomes more scattered by the atmosphere, in a way that is similar to a change in heat. This scattering of light that causes the goldenness of sunset is called Rayleigh scattering.
By making adjustments in photographic white balance, we can edit some aspects of the light to simulate or counteract Rayleigh scattering.
Rayleigh scattering means that the yellow to blue wavelengths of light will scatter more as the atmosphere is thicker. At sunrise or sunset, the red to yellow wavelengths of light keep on traveling, but the yellow to blue forms get scattered.
By making a white balance adjustment to emphasize or neutralize or simulate a sunset, we are addressing the loss or desired addition of those yellow to blue rays that would be lost in nature by Rayleigh scattering at sunrise or sunset.
To check the apparent shift in white balance values at sunset, record two test photos: one in daylight and one in tungsten. Make the tests an hour before sunset, half hour before sunset, and at sunset. The shift in white balance of the light will be observable, and easier to understand in terms of white balance, with those six photos on hand.
Projecting Images with Light and White Balance:
Digital photographers and presenters, note:
If the photo is a digital image, seen on the web or computer monitor, there is at least a fourth layer to the problem:
If the final image is seen with a source of incident light,
like a slide projector or a digital photo on a monitor:
4. The definition of white as transmitted by the
final viewing lamp (slide projector or viewer's computer monitor).
That fourth layer of the problem is an element often beyond the photographer's control in digital photography. It contributes to the appearance of the final image, as the telecommunicating viewer sees it. It influences his view of the photo, even though it is beyond the photographer's normal control.
A discrepancy between that fourth layer, and preceding layers, has an orange/blue coloring influence which can affect the photo in the same way as a discrepancy within the first three stages.
Remember the layers of the problem when editing white balance in photographs.
# # #


No comments:
Post a Comment