Showing posts with label photography 645 120mm 35mm black and white. Show all posts

Tuesday, February 24, 2009

Daydreams, Desires and Equipment Limitations

By John O'Keefe-Odom

Technology is inescapable in photography. No matter what we do, we are bound to it. In nature, photosensitivity is rare; it occurs all the time, particularly in plants, but it does not occur in ways that are easily perceptible to us as people. We definitely do not see nature being photosensitive in a way that will draw images for us at our command. Nature does not operate a camera. Cameras are a human creation.

Even if we eliminate the camera from our photographic process, we will still be bound to technology. Occasionally in your explorations of Photography, you will come across camera-less photographs. Even those photographs were bound in some way by technology. The paper that was used was built with a special and specific set of chemicals. It came into contact with other chemicals in a special and specific way. The result was an image, fleeting or permanent, that you can view.

We cannot escape technology in Photography.  

We can, however, use what we have better.

I am willing to bet that over 90% of our problems as photographers lie not with the equipment, but with us as operators. Maybe you are an advanced professional, and you do have situations where you need a certain specialized set of equipment to make those images that you sell commercially. Even then, I think, there is a good chance that a majority of the problems that had to be overcome in a photographer’s career had not to do with the equipment, but with our understanding of how we should use what we have.

The math is not all that glamorous. Measuring light is hard to write about and hard to talk about because it is so situational. To make matters worse, the world is a complicated place. Inside the frame of our composing, we still see sometimes hundreds of images and shapes that are too complex for us to really understand. Consider a picture of a a tree. Do we really know all there is to know about how lights, darks and midtones will show up on the negative before we snap that picture? Are there not hundreds of shapes and details in that overall image? Do not each and every one of the leaves on that tree reflect the natural sunlight in their own way, when seen from the camera’s point of view?

Understanding those details, in advance, and receiving the light with the equipment in the right way is a lot of what photography is about. In order to do this well, we need to know ourselves, know our equipment, understand its limitations, and also know and understand the situation that is before us. Particularly, it’s important that we understand how light flows through the place where we are taking the picture. And, we must understand how the light flows into, through and around our equipment and ourselves.

If you know that you cannot frame the image you want to capture because the lens won’t focus at the distance that would get you close enough to make that picture, then you have an equipment problem. If you know that your subject is so far away that the image does not fill the frame as you need it to, you have an equipment problem. If you can’t open up the aperture far enough, if you can’t get a shutter speed that is fast or slow enough, if you are in an environment that will destroy the camera, then you have equipment problems.  

Most of the time, we actually have equipment problems with the photographer, not with the camera.

Your camera needs to be in good working order for its design. If you have light leaks that are ruining your film, if your film advance jams, if you dropped the camera and broke a part, then you have equipment problems that need repair. Go to a camera shop, get a repairman to help you size up the situation, then make the decisions within your budget that either fix it, or let you carry on despite it. Broken cameras are a source of equipment problems.

Fancy cameras owned by someone else are a source of jealousy problems.  

We all have desires. And, yes, I will tell you that having good equipment is a blessing. It’s great, sometimes. And, yes, I will tell you that photography is easier when you have the money for it. If you can make some mistakes and use some resources without breaking the bank, having some money to spend on the photographs will really help you. But, I can tell you from experience that the great equipment that you daydream about will not necessarily automatically improve your pictures the moment it arrives in your hands.

All new pieces of equipment come with their own limitations and responsibilities, just like the equipment that you probably already have. I believe I learned from woodworking that all new tools come with at least five new responsibilities for every problem that they can fix. Cameras are tools; they are like that, too.

Eventually, you can get better equipment. Sooner or later, if you persevere, you can get some. When you do, enjoy it. But know that, even though photography is always intimately connected to the technology used by the photographer, the decisions we make about how to manage the light to create our photograph are more powerful and influential on the final image than the make or model of the camera itself.

You can do it. You can make better pictures. And, you probably don’t need that great and expensive equipment to do it. What you probably need to do, in those days when you are daydreaming about better equipment, is to make better use of what you already have.

Equipment Lessons Taught By Squirrels, Grizzly Bear and Deer

By John O'Keefe-Odom

Nowadays, I have great stuff. Over the years I have been able to advance to the point where I believe that I can confidently say that I own a professional camera rig. Sometimes, I am self-conscious about how I think I must appear to other people who walk by as I am making a picture. But, those treasures only make my life easier. They do not, in and of themselves, make the image possible.

I spent over 20 years intermittently operating the most basic equipment. I did not have regular access to a darkroom. I could barely afford to process film. When my frames were exposed, I had to budget carefully to come up with the money to get that roll printed and developed. My progress was slow; my failures were common and plentiful.

I had so many failures that one day I sat down and ripped up stacks of my photographs. A couple of hundred prints were ripped in half, by me, and thrown in a cardboard box. They were all thrown away. At the time I was thinking that if I were to become a professional photographer, if I were to become a great artist, it would be imperative that my mistakes were hidden from everyone forever.

Well, it’s probably not a major loss that those old photographs are gone. The ones I destroyed were all a major disappointment. Each one, one by one, was its own minor disappointment. As a group, they were a big failure. All totaled, the whole box of ripped up prints probably had cost me a couple of hundred dollars. I felt the fear of the price tag of what I was doing as I ripped up those prints. But, I was determined to put that all behind me. In practice, it wasn’t destroying those photos, but another fifteen years of failure and maturity that eventually made for better photographs.  

In those prints I destroyed, each time I had failed to show the image that I was seeking to capture. Every time, I tried and failed. Even if the exposure was right, the composition was wrong. I particularly remember that I was wrong as a young teenager about my pictures of squirrels.

As a boy, I wanted to be a nature photographer. I wanted to have the sort of traveling photojournalist adventures that I am sure many people daydream about when they think of photography. I wanted to go to exotic places, do adventurous things; I wanted to be the guy who rappelled down that difficult cliff face; I wanted to be the photographer who took the picture of the people who would summit the mountain; I wanted the action shot of the grizzly bear; I wanted the play of the sunlight on a bird’s feathers in a picture suitable for John James Audubon. I wanted that adventure and that life. The closest I came on a daily basis were pictures of squirrels in the yard.

Squirrels are a not grizzly bears, but they can also require stalking. There I was, a young teenager, reading up on nature photography and stalking techniques. How did the professionals operate from their hide? How did they select the right path so that they made sure their scent blew downwind when the animal they stalked was upwind from them? I never really got to do any of this, but time after time, I would pick up my 35mm camera, use the one telephoto lens I had from my dad, and set out to take a picture of a squirrel in the yard.

The photos were terrible. I never got close enough. Even with the telephoto lens (200mm), I would still screw up. How and why would this happen?

It was usually because of the decisions I made as a photographer.

Later on, years later, decades later, I crouched in the forest to take a picture of a flower growing in the wild. A deer walked by. It was not the first deer I had ever seen, maybe it was the hundredth. My camera was not ready. My rig was set up for close-ups of the flower I was going to photograph. If I was to change my equipment, surely the rustling and zipping and clicking would be enough to startle that young deer.

It was a juvenile. Growing into an adult, that young deer still had traces of its spots. It was picking its way through the forest floor. Judging by its path and the weather, I think it was thirsty. There was a creek nearby. This creek fed a beautiful waterfall here in the forests of Tennessee. I stayed there, crouched near my camera on a tripod, and did not try to take a picture of the deer. I knew I would not be able to get ready. I knew I did not have time to measure the light or frame a good composition or change the configuration of my equipment. I could see that deer slowly walking by. Even for an animal that requires stealth to survive, it made noise as it walked along the dried leaves of the hardwood forest’s floor. The deer was about 15 meters away. I watched it walk on past me, and I enjoyed it. That was a great chance to be a nature photographer. I am glad that I had learned not to be too ambitious; my rustling through the camera bag would have been useless; I would have only spoiled the moment; and, I would not have gotten the picture in time. Instead though, I crouched there in my street clothes, enjoying an afternoon in the woods, and I watched a deer walk by as I set out to photograph a flower in the woods.

Not bad for a kid born in the city of New Orleans. As a child, I thought I would be lucky to be in a place where there are mountains and trees and animals. I was right about that.

The camera I was using was rigged up for photographs of flowers. There’s no need to rush down to the store and buy equipment for the deer-stalking photo. Even if you can afford it, there’s no guarantee that the opportunity will present itself in the right way at the right time for you to take that great picture. Instead, you have to make the decisions that you make, and take the pictures you take, with what you have at the time.

View Camera Bellows and Macro Bellows


By John O'Keefe-Odom

Bellows: they’re not just for accordions anymore. Over the years, some people seem to have bemoaned the bellows as devices which suck up light, decreasing the maximum usable f/stop, and burdening the photographer with a bulky and unwieldy camera kit that will never be useful. Those of us who love bellows probably couldn’t disregard those nay-sayer detractions more. We’re too busy enjoying our macro bellows.

For those who haven’t used them before, let me dispel one assumption I made about bellows that was incorrect. The macro bellows on the medium or small format camera kits are not the same as view camera bellows. Even for those macro bellows kits where a tilt or shift function is available, an important part of the magic of view cameras and their bellows is, in fact, built into the lens design view cameras use. It is possible to purchase a medium format bellows kit that will turn a small or medium format camera into a miniaturized view camera. However, in order to get such a rig to work, the type of lens that will have to be used would be a view camera lens.

The structure and optical groupings of view camera lenses is simply, fundamentally different from the average bayonetted SLR lens. For example. when seen from the side, view camera lenses typically have an hourglass shape; perpendicular to their central viewing axis, the lenses are symmetrical; they bend light coming out of the rear of the lens in a way that mimics how it was bent coming in; as a trend. Bayonetted SLR lenses are asymmetrical configurations of lens elements, grouped, designed and constructed in a way that will bring the desired field of view, magnification and intensity to the recording surface in a way that’s efficient, economical, and frequently, adjustable.

One can find a way to mount a view camera lens to a medium format camera through attachments; but, cost fact remains; the view camera lens will frequently out-price the SLR lens by ten times the SLR’s price. Expect to pay between $1500 and $2500 for a view camera lens that offers a viewing angle comparable to a bayonetted SLR’s lens of a tenth of the price. If it weren’t for the additional cost of manufacturing and using view camera lenses, we would probably all find a way to bolt them onto our cameras.
# # #

Growing the Equipment Collection Based on a Chosen Process

By John O'Keefe-Odom

During all these years of failure, I spent a great deal of time working with nothing. Knowing what I know now, if you have only a simple camera and a lens, and very little money to spend, here’s what I would consider advising for growing your equipment collection on the cheap:
Plan those big advances in equipment. The tools are going to cost you. Pick carefully. There’s enough of a selection out there on the market today to let you take anything from an action shot of a paramecium through a microscope to the moons of Jupiter and the rings of Saturn while perched on a mountaintop on another continent.  

Search for hidden costs in those big equipment purchases. One of the reasons I do not own a view camera, although I would very much like to own and use one, is that I cannot afford the space and supporting materials to own and operate an enlarger of that size. 

My rig is set up for medium format. I keep a simple set of tight equipment that works well in my collection. I can store it easily. I can set it up and operate it at will for a reasonable cost. I cannot afford a 4X5 enlarger the size of a refrigerator in my transient bachelor lifestyle.
Think ahead, if you had this equipment that you desire to use, what would it take to get it up and running and use it to death on a daily basis?

If you are not willing to use it to death on a daily basis, you may not need it.

If you look at your photos, and you see that yours are not cutting it because the photographers you admire have those strong blacks and strong whites and delicate grays in just the right places in their photos, and yours do not, maybe it is because your exposure is habitually wrong. It could be the printing process you are using; it could be your exposure decisions during the camera operation; it could be the way you are developing the negatives.

Get a good book written by the masters about calculating exposure. If you cannot afford to buy one, go to the public library. Even if you can afford to buy one, go to the public library anyway. There will be a treasure trove of books on photography there. You can peruse them at your leisure without having to spend anything. A typical shelf of photography books in a library usually represents a cost of hundreds of dollars invested by the community. The intensity and organization of the content in library books are usually superior to the cosmetic overviews and commercial ads found on the internet.  

Before you go out to get that next lens or camera body, consider growing your equipment collection along the path of the process of photography, if you have not done so already. Can you develop your own negatives with what you have? Can you make a print? If not, put a stop to that. The other stages of processing, beyond the camera, each, have almost as much influence and control over the appearance of the print as the camera operation does.

If you only have a camera and a lens, consider this outline of how to expand your equipment collection:

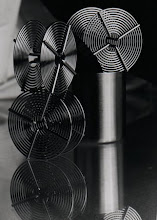
For developing the negatives, at a minimum you would need: a developing tank that fits one or two reels; a graduated cylinder (I prefer two) for measuring liquid to the right proportions; a changing bag for conveniently loading the film into the reels, some way to light proof a room (I find that dark blankets do well); some chemicals for three-bath development (developer and fixer are required, you can add a stop bath or use plain water); some way to hang your negatives to air dry.

I also like to use a thermometer and some opaque bottles to store the chemicals in. I use one set of buckets for mixing bulk chemicals. I use small bottles that hold one liter for storing smaller, easy to use amounts; the small bottles make it easy to pour the right amount into the developing tank. For pouring back out, I catch the outgoing liquids in one of two graduated cylinders. The other cylinder is already loaded with the chemicals for the next stage going into the developing tank.  

For printing, the minimum amount of equipment would go into supporting a contact printing process. This may not be attractive to the beginner, but I have found that in my own darkroom, it is the contact print that is the most informative to me. A bare minimum equipment list would be: a common picture frame (for holding print paper and the negative together in a flat, organized way); some method of turning on a light on and off quickly and decisively (a wristwatch and a light switch might work, it depends on the speed of the paper); four containers (trays) for holding the developing chemicals; a source of water; some way to hang up the prints to air dry.  

For convenience, I would recommend a paper safe or some other method for storing the print paper in a light-tight box. The print paper will come packaged in an opaque plastic bag inside the manufacturer’s box, but a separate light tight storage is a good idea; that way, if you do have an accident and expose the bulk paper to light, you may have had the chance to compartmentalize your collection of print paper. With some paper in the box, and a small amount of paper in the paper safe, you would only risk a portion of your supplies to your own bumbling.

Let me caution you: the minimum, for the printing stage, will be frustrating to use. For darkroom work, you will really need an enlarger, a safelight and a timer. Add that, and you will really get rolling! But, as you can see, even if you have “nothing to work with,” it’s not the expensive items, but, rather, frequently used common or inexpensive items that can get the process rolling all the way through for you.

Research the process before you start building your improvised darkroom. The process and equipment I have outlined above, for printing, is thin; but, it will work to make very small prints you can learn from.

As you acquire equipment, save the technical data sheets and manuals that come with them. Yes, after a few moments of review, you will probably figure out how to use that camera. Yet, sooner or later, you can benefit from a review. Somewhere in those data sheets, somewhere within that operator’s manual is that one sentence, that one word, that you will need to improve your procedures. They can help you uncover mistakes and improve your photographs long after you learn the basic functions of your camera and its supporting equipment.
For some unknown reason, people have a tendency to throw away the data sheet that comes with photographic print paper. Maybe it is because when they open the box, they are in the dark. We are usually focused on protecting the print paper from light at that point; maybe sometimes thinking about an upcoming print instead. Save that print paper data sheet, too. It can help you later.
# # #

Notebooks: The Best Equipment Investment

By John O'Keefe-Odom

Write down every camera setting, every time and temperature and mixture of negative processing, every enlarger setting and basic chemistry information about your printing. Soon, you will discover which of the settings are most influential for you; probably times and apertures.  

Write down anything you can think of that might have influenced you to take a picture in that frame. This also goes for those who like the newer, digital processes. In fact, recording decisions made with the lengthy and detailed lists of computer functions digital photographers use might even be more important. User menus and software dialog boxes make switching electricity on and off, make deciding to do something so easy, that a computer-based photographer may not even realize how many, or what kind, of decisions he is making. All decisions about a given frame affect the outcome of an image one way or another. Our digital photographer brothers, too, could probably benefit from making some exposure notes in a notebook.

The notebook is the most important because when we get to the end of the process, when we are looking at those disappointing images, we often don’t accurately remember what we did to make them. I can usually remember about what I did; yet, I cannot accurately remember each and all of those influential camera settings used on just one roll of film. The notebook helps me. Recording what you did, immediately after you did it, will help to refresh your memory when it is time to edit those photographs.

I find that recording what I did in the darkroom to be the most helpful. Times and apertures and filter settings, all recorded, can help me to reproduce an image later with less testing and materials consumed. Camera setting information helps me to relate field decisions to the negative image. On the whole, the notebook is one of the most important items you can have.
An ability to measure the light is another. If your camera does not have a light meter, get one. If it does, understand everything you can about it. A spot meter works well; fortunately spot meter functions are built into many cameras produced after 1990. I now use a hand-held spot meter. I have cameras that have no light meter in them; I have been able to use one effectively because I had this spot meter on the scene. Using a hand-held spot meter also helped me to understand how my camera’s on-board TtL worked. They are a good investment.

I believe in spot meters so much that I would say that a good 1 degree-spot light meter is probably worth more than a second camera, no matter what model your first camera is. Something to think about. Regardless of which metering system you use, your exposure calculations can really benefit from understanding how the light is being reflected at the scene of composition. Not understanding exposure decisions, not really understanding exposure decisions, is bad news for someone who wants to make an image through a process that is going to involve so many subsequent decisions and steps.  

You can trip the shutter while not knowing if you want; but there will be many decisions made about that image later, if you choose to use it. Just to carry it through to positive printing will involve many decisions. Consider knowing and understanding how that light flows into your camera. It can benefit you.
# # #

Plain Jane Alpha Hydroquinone Developer Recipe

By John O'Keefe-Odom

Plain Jane Alpha Hydroquinone Developer

Water (Hot, 110F to 125F) 750 mL
Sodium Sulfite 60g
Hydroquinone 24g
Sodium Carbonate 80g
Cold water to make 1L
Dilute 1:4 at stock solution to water. Develop print paper normally.
This Plain Jane recipe above is little more than a modification of an Agfa 120 developer recipe. The difference being that Sodium Carbonate has been substituted for Potassium Carbonate. I based the substitution on available materials and a note in an Ansel Adams book that said he had used such a substitution with success in another developer formula.
I enjoyed mixing it up and using it. I hope you do, too. I was pleasantly surprised.
The developer yielded a full range of grays complimented by those full, rich, cold blacks that puts the black back in black and white photography.

Plain Jane Stop Bath

13cc glacial acetic acid
35cc water
water to make 1L to reduce the 28% acetic acid to a usable percentage per liter.
The proportions determined to scale this recipe up into 3L worth of solution were:
39cc glacial acetic acid (the amount of acid it would take to reduce to 28%, for dilution to a working solution, as above, but tripled to yield three liters of working solution).
2961cc water (water to make 3L)

Plain Jane Hypo
800mL hot water
240g Sodium Thiosulfate
200m water to make 1L